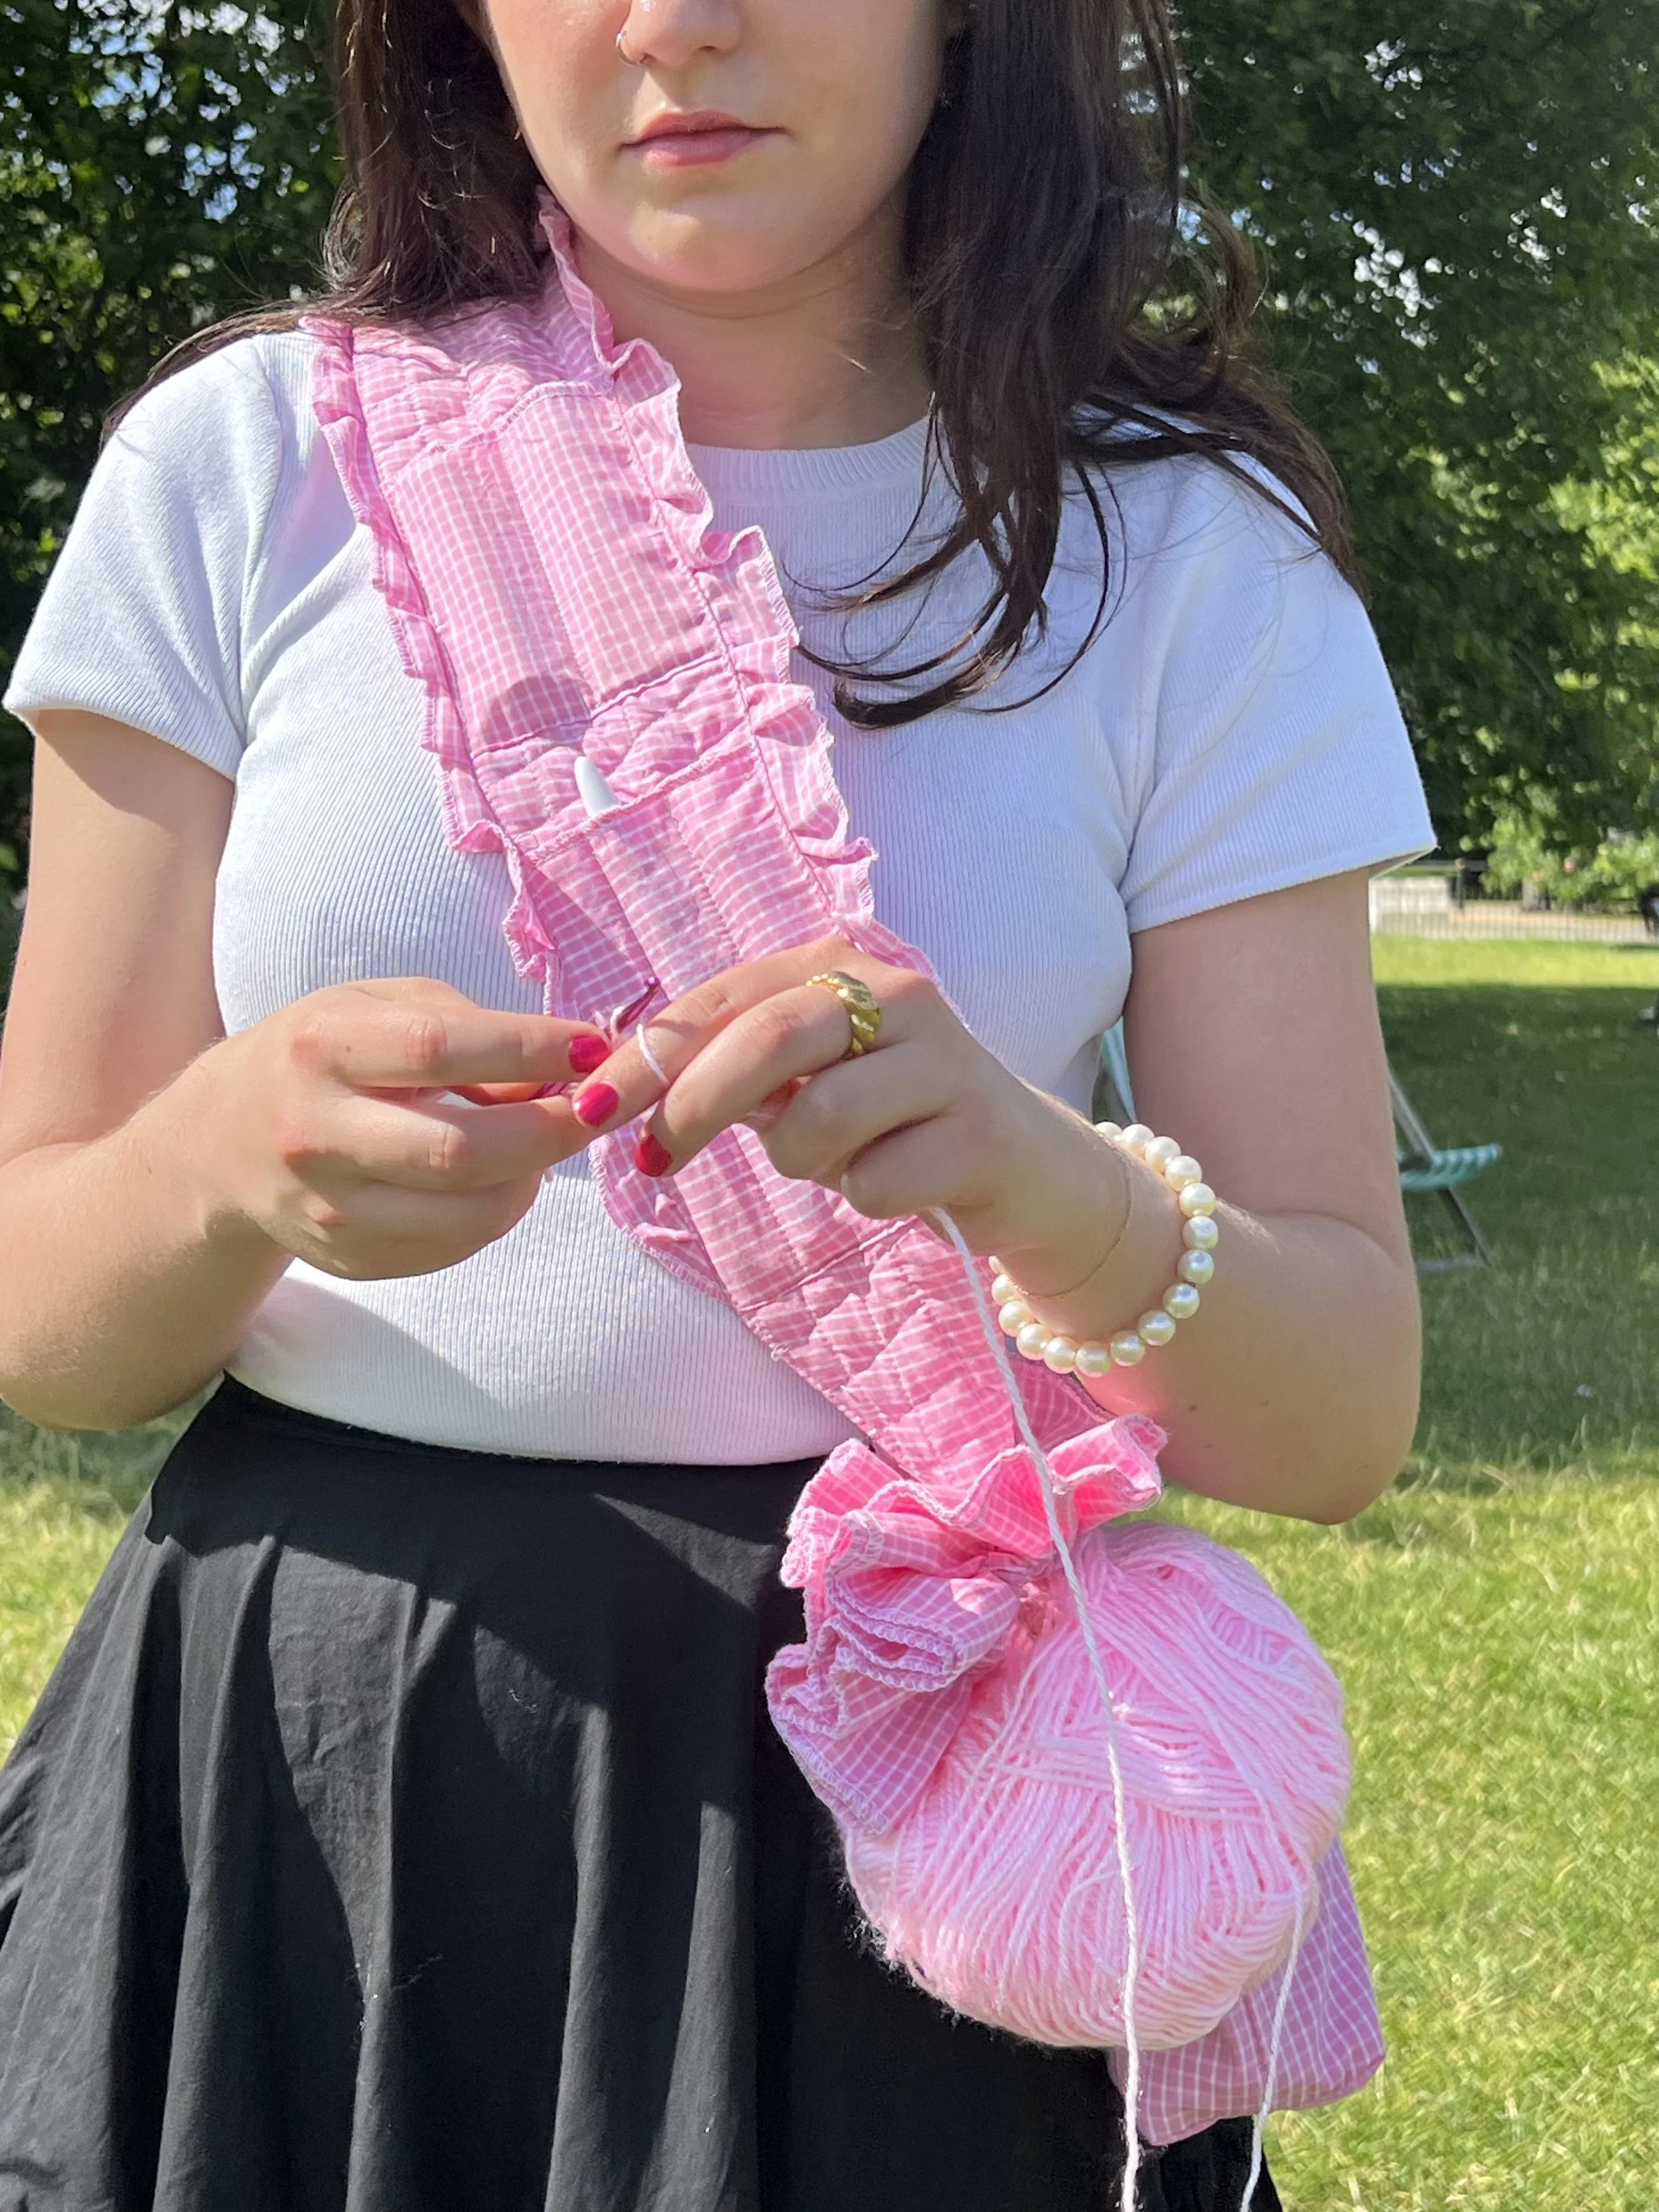
prom queen tool belt
pattern info
Keep all of your essentials on you with this material grrrl take on a tool belt: a wide strap of utility pockets, but add some frills, tote attachments & a hook up for your ball of yarn.
The sash is quilted before adding custom-sized utility pockets (so you can carry everything from your current crochet hook to your favorite lip gloss) and inserting frills up each edge. Attach lobster clips to either end to customize your attachments, including options for custom-sized bags, scrunchies, and more.
Measure
Wrap a measuring tape around your body - start from your waist, pull over your opposite shoulder, and wrap back down to the waist point you started at. Use this measurement for “Sash Length.”
Materials
Approximately 1 meter/yard of fabric
Batting
2 lobster clips/carabiners
Pattern Pieces
Cut three rectangles for the sash: 2 in your main fabric (these will be the “Top Sash” and “Bottom Sash” pieces) and 1 in lining
Width = 4.5 inches / 11.5 cm
Length = Sash Length (as measured above)
Click here to download the “Sash End” pattern piece. Use it to cut each end of your rectangles to a point.
Cut 2 rectangles for the frills:
Width = 1 inch / 2.5 cm
Length = 1.25 x (times) Sash Length
Cut 2 rectangles for the lobster clip loops:
Width = 1.5 inches / 4 cm
Length = 6 inches / 15 cm
Cut custom-sized rectangles for utility pockets:
Width = 4.5 inches / 11.5 cm
Height = Custom, based on the height of what you’d like to put in them
Pocket Planning
Custom utility pockets will cover the width of the sash and then be split up by lines of stitches to fit different items across the row (see pictures). After accounting for quilting & seam allowance, there will be approximately 3.5 inches (9cm) available to split between the pockets.
Fine Print: Copyright © 2024 Alexa Kari Designs. For personal use only. Reader/purchaser may not copy, resell, or redistribute any part of the pattern without permission. Reader/purchaser may not sell any garments created following the pattern.Video Tutorial
A complete video tutorial for the Prom Queen Tool Belt is available on the Material Grrrlz YouTube channel:
Subscribe to get free patterns straight to your inbox:)
instructions
Quilt the top of the sash together
Insert batting between the sash lining piece and Top Sash piece (wrong sides together) and pin in place.
Sew gridded lines over the batting to quilt the sash (lines in the sash pictured are 3/4 inch / 2 cm apart)
Attach custom pockets
Serge or hem the top of each pocket
Attach to the front of the sash by folding the bottom edge under, pinning in place and stitching across it
Stitch vertical lines across the pockets to section off custom-width spaces
Note: The edges of the pockets will be secured in the next step when adding the frills.
Attach frills
Serge or hem one long edge of each frill
Gather the other long edge of each frill until it matches the length of the sash (not including the pointed edges, see pictures)
Place frills right side down on each edge of the Top Sash. Finished edges should be pointing towards the middle of the sash, gathered edges should be lined up with the edge of the sash. Make sure the end of each frill hangs off each corner of the sash (this will ensure that the end is enclosed on the inside of the sash when we turn it right side out)
Fold each lobster clip loop in half (long edges touching, good sides together) and sew down. Use a safety pin to turn each loop right side out. Place a lobster clip loop at each end of the sash (short edges matched up, with the length of the loop extending towards the middle of the sash)
Place the Bottom Sash on top of the frills and loops, right side down. Pin everything in place
Sew around the entire outer edge of the sash, leaving a 3 inch / 7.5 cm gap along one edge
Pull the piece right side out through the hole. Fold the opening closed and top stitch around the entire sash.
Lobster clips
Insert each lobster clip loop through a lobster clip, fold it over to conceal the raw edge and sew down to secure the clip in place.
Add ons
Scrunchie: Pattern available here
Custom drink pouch: Pattern available here
Custom phone pouch: Tutorial included in the video pattern for the sash. Use the same instructions to create a custom tote of any size.
Hooked up: To carry keys, a ball of yarn, a scrunchie, etc. on your sash, simply pull the lobster clip through the center of the object and link the two lobster clips together.
This pattern was originally published in the Q3 2024 issue of Material Grrrlz
Download the whole issue for free here!
(featuring even more free patterns and girly fiber art activities…)


