
off the clock shift dress
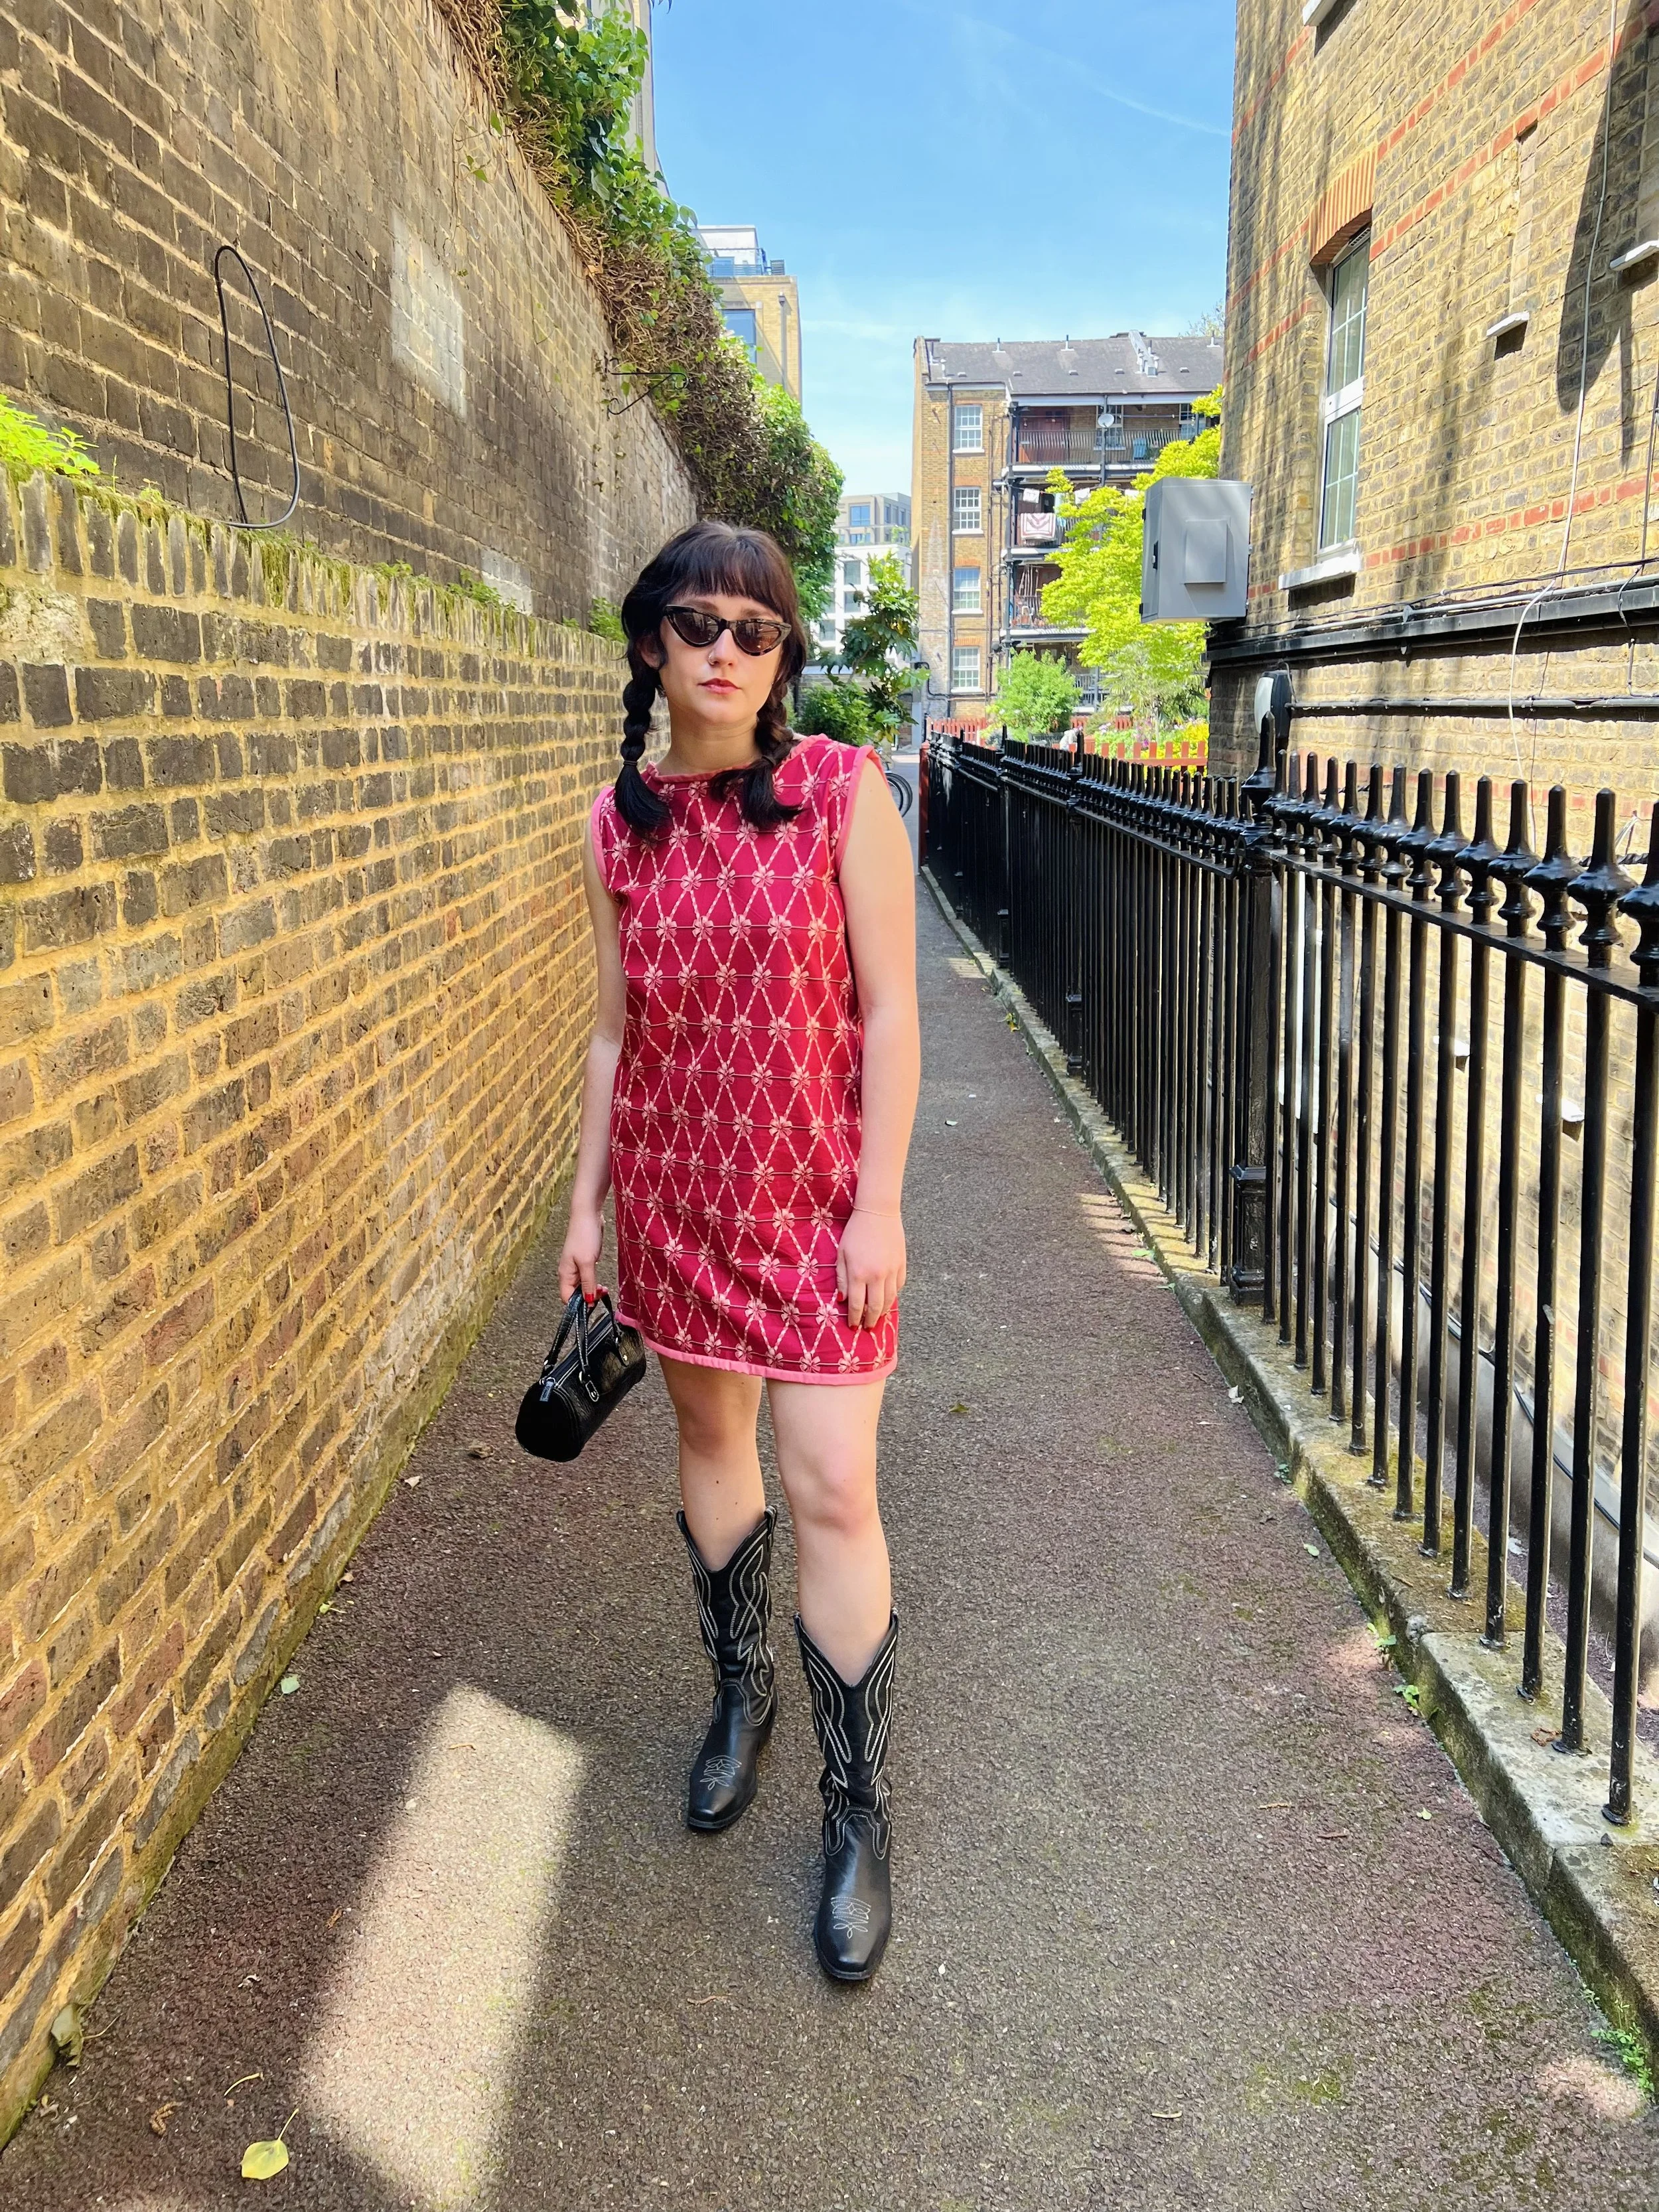
every grrrl needs an easy look to slip in to when their shift finishes in 15 mins & their gal pals are already at happy hour. this shift dress will be your best friend - it’s easy enough to throw on when you clock out AND cute enough to make you feel ready to hit the town. it’s simple construction lets your fabric’s print shine and guarantees you’ll have your go-to dress of the summer ready after just an afternoon at your sewing machine:)
this is a self-drafting tutorial. you will use one of your shirts to build your own pattern and create a dress unique to your measurements.
measurements
measure from your neck down to the widest part of your hips. this is measurement A.
from your neck down, measure how long you want your dress to be. this is measurement B.
measure your hips/butt at their widest point. divide this measurement in half and add 1.5 inches. this is measurement C.
add 1 inch to C. this is measurement D.
drafting
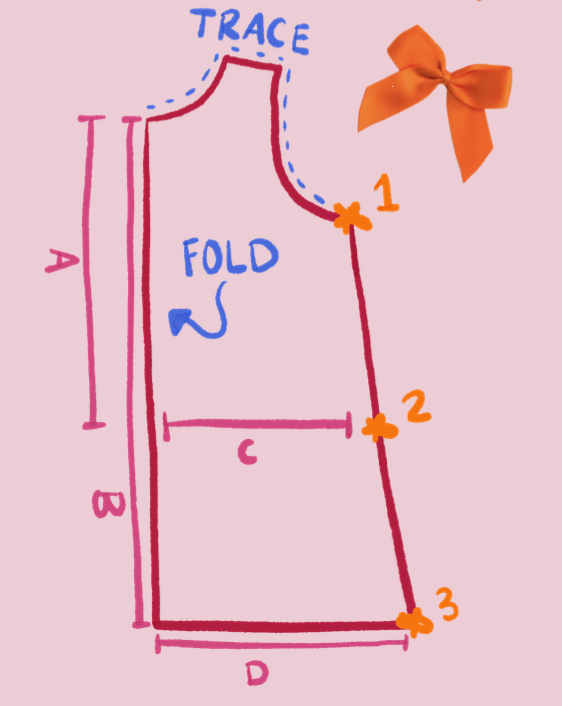
use the diagram above to follow these drafting instructions.
begin by finding a non-stretch tank top in your closet that you like the fit of. lay your fabric out and fold it in half lengthwise (so you have enough length to cut the entire dress length with one piece). fold your shirt in half and place the fold onto the fold of your fabric. trace the neckline, shoulder, and armpit of the shirt. mark a star 0.5 inches out from the end of the armpit (this accounts for seam allowance). this is star 1.
from the neck marking, measure down A inches and mark a dot. at the dot, measure C inches out from the fold and place a star. this is star 2.
from the neck marking, measure down B inches and mark a dot. at the dot, measure D inches out from the fold and place a star. this is star 3.
use a ruler to connect dots 1, 2, and 3. draw a straight line from dot 3 to the fabric fold.
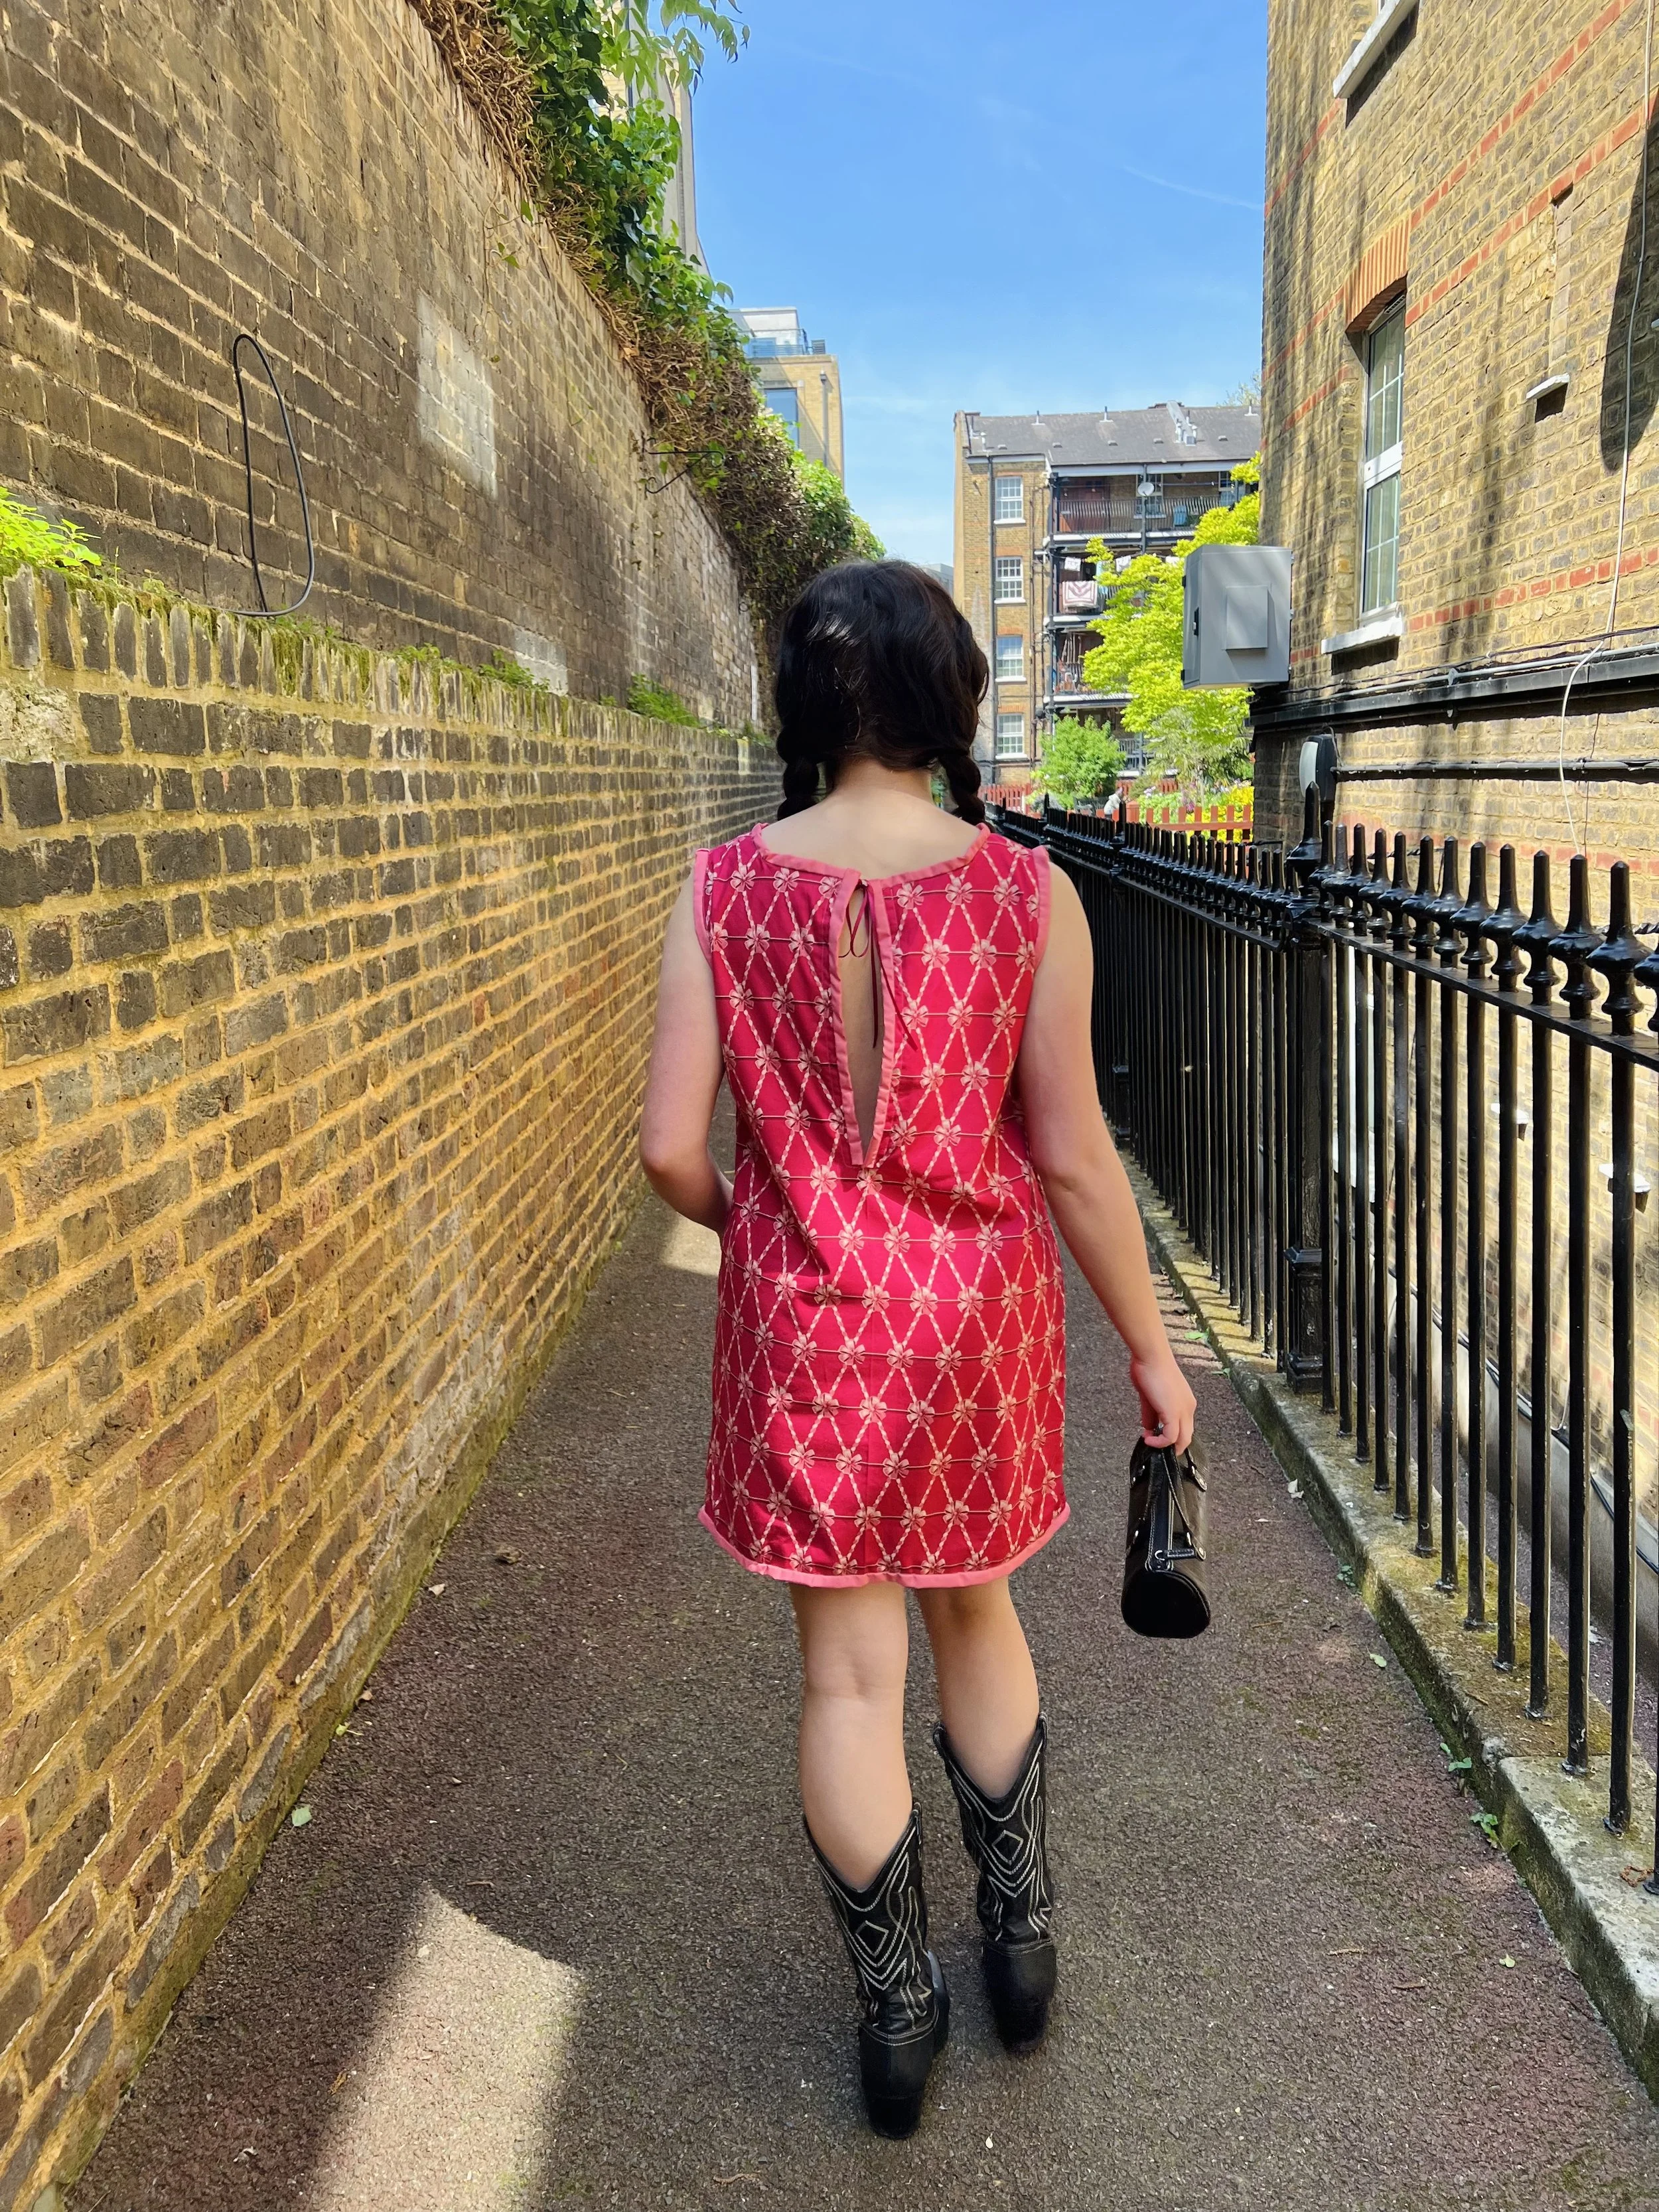
you have created the front of the dress! cut it out and use it to cut an identical piece for the back piece. fold the back piece in half and cut a 12 inch line from the neck down. this will make the open back.
FINE PRINT: COPYRIGHT © 2023 ALEXA KARI DESIGNS. FOR PERSONAL USE ONLY. READER/ PURCHASER MAY NOT COPY, RESELL, OR REDISTRIBUTE ANY PART OF THE PATTERN WITHOUT PERMISSION. READER/PURCHASER MAY NOT SELL ANY GARMENTS CREATED FOLLOWING THE PATTERN. Subscribe to get free patterns straight to your inbox:)
how to sew the dress
pin front and back pieces wrong sides together and use french seams to sew both sides and shoulders together.
bind the hem, shoulder holes, neckline, and open back. you can create your own binding in a contrasting fabric or buy bias tape at your local craft store.
finally, cut two pieces of ribbon (or sew two ties) and attach to either side of the open back at the top. tie a bow to close it off.
techniques
how to create french seams:
-place fabric wrong sides together and sew down.
-cut excess fabric as close to the seam as you can.
-fold fabric around so good sides are together and raw edges are enclosed.
-sew down to hide raw edges and finish the seam.
how to sew binding:
-with good sides together, pin the raw edge of your binding to the raw edge of your fabric and sew with 1/4” seam allowance.
-flip your binding to the back of your piece (it should cover the line you just sewed). sew in place - i recommend the “stitch in the ditch” technique, where you stitch down the binding seam on the front of your garment in order to catch the fabric on the other side and keep everything in place with a discreet stitch.
This pattern was originally published in the May/June 2023 issue of Material Grrrlz
Download the whole issue for free here!
(featuring even more free patterns and girlie fiber art activities…)